<< View More Posts
New feature: Webhooks
A new feature is available today to all Pushover users: native Webhook support.
While Pushover’s own Messaging API is pretty neat, there are systems and services that still don’t support it(!) so we have our own E-Mail Gateway and 3rd party services like IFTTT to receive data from other places and turn it into Pushover notifications.
For other systems that don’t support sending e-mail (or do support it but send mail in a strange format) but do support JSON to webhooks, you can now create webhook receivers through the Pushover website and turn that data into custom notifications.
Creating a Webhook
To get started, scroll down to “Your Webhooks” on your Pushover dashboard and click “Create a Webhook”.
Give it a name, and then you can skip the Data Extraction section for now unless you know the exact format of the data the webhook will receive. We’ll come back to that in a bit.
Note that unlike our E-Mail Gateway, you will need to have at least one application created to use as the sender of your notifications. Like our E-Mail Gateway though, you can configure the notifications that are generated from this source.
Once you click “Create Webhook”, you’ll be shown the unique URL for your new webhook receiver:
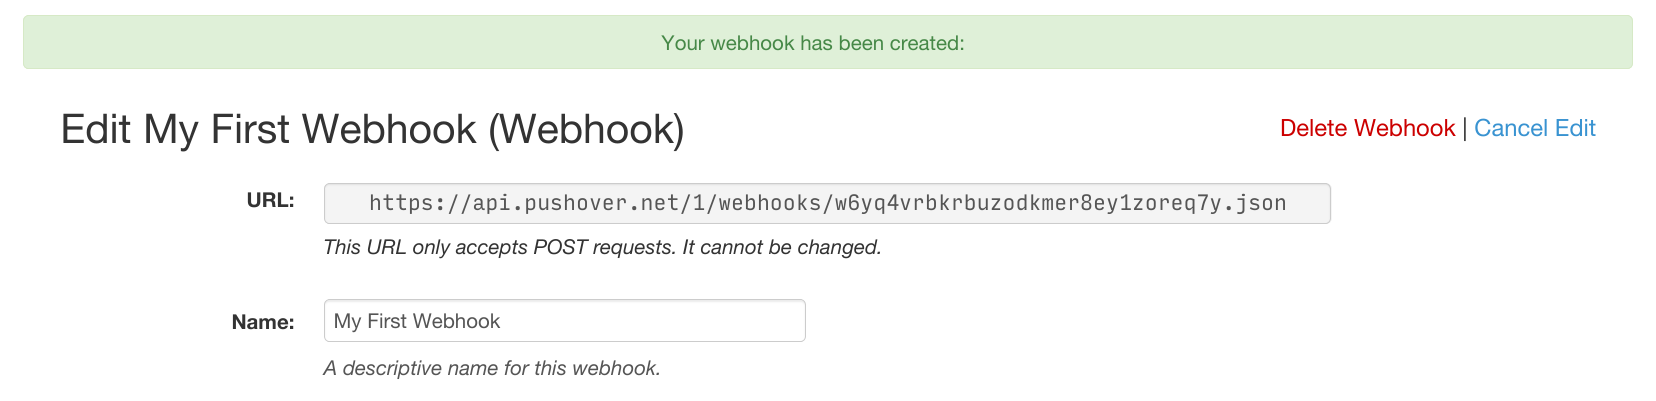
This URL can now be plugged into whatever software or system you’re configuring to use as the receiver. If the option is given, make sure it’s sent as a POST request.
Example: Unifi Protect
To help explain how webhooks work, I’ll configure one in Unifi Protect. If you run your own offline Unifi gateway and don’t have it connected to a Ubiquiti account, you won’t be able to send notifications or e-mail from your gateway.
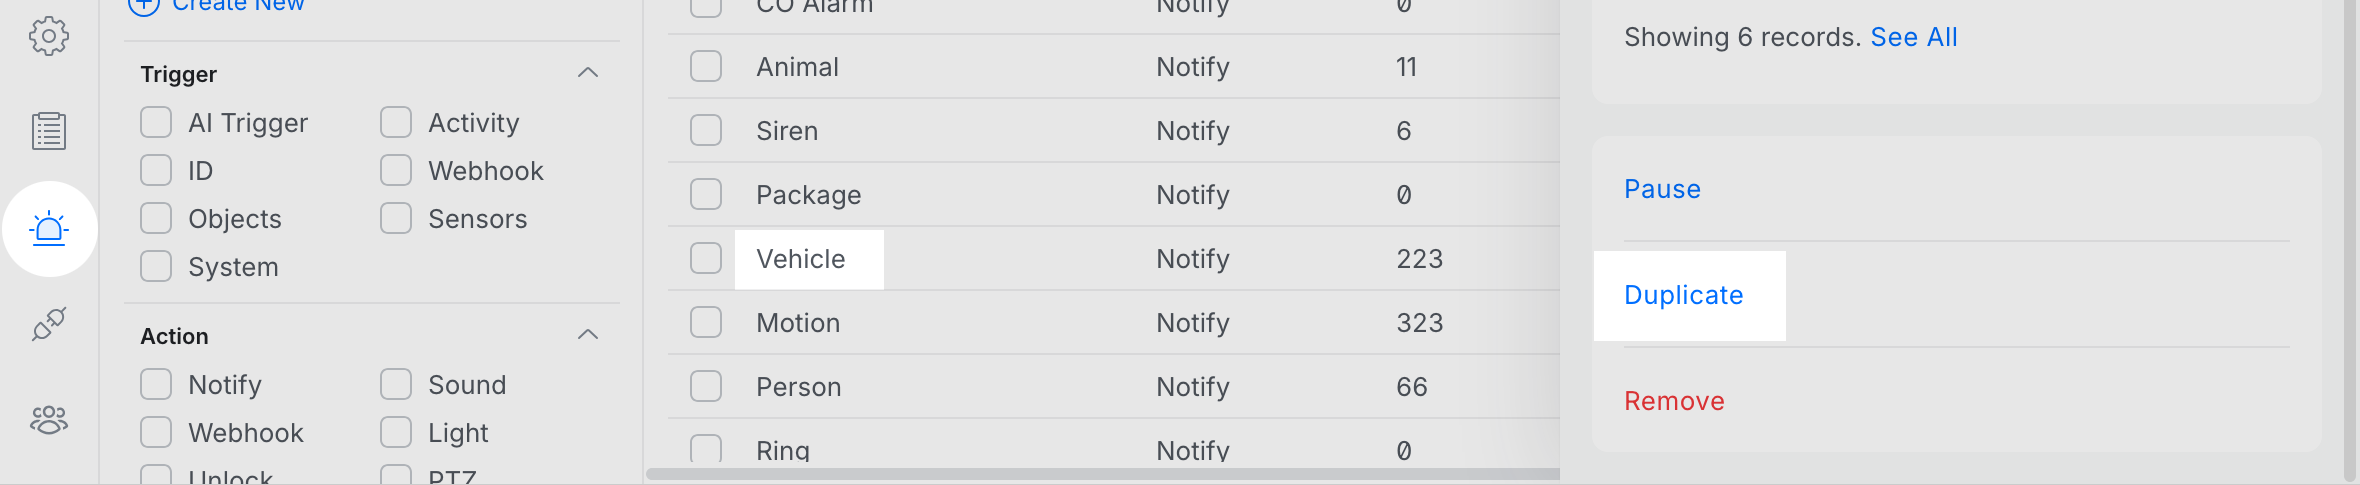
In the Unifi Protect web interface, click Alarm Manager on the left sidebar. Choose a pre-defined trigger that you want to set up and then click Duplicate on the pop-out panel. We’ll choose Vehicle to see when there’s any cars driving by.
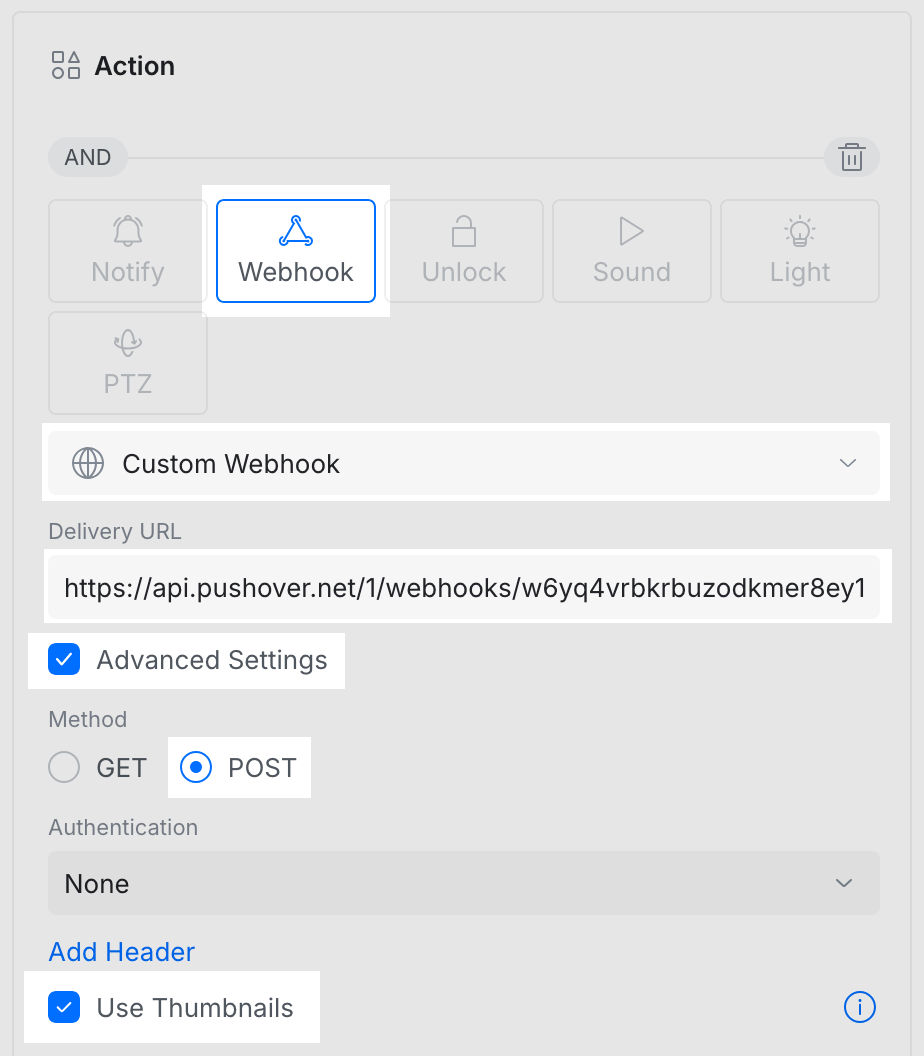
In the new alarm detail screen for your duplicated alarm, under the “Action” pane:
- click “Webhook”,
- click “Custom Webhook”,
- paste your new webhook URL (received from the Pushover dashboard) in the “Delivery URL” field,
- click “Advanced Settings”,
- click “POST”,
- if the alarm you’re configuring is for a security camera, enable the “Use Thumbnails” option,
Finally, click the “Create” button on the far left next to the alarm’s name.
Once created, try to trigger the alarm. (Frustratingly, the “Test Alarm” function in the Unifi dashboard does not send the same payload data as a real alert so we might not be able to extract everything from it.)
Back on the Pushover dashboard at your webhook’s edit screen, click “Check for Update” in the “Last Payload” section. If your system successfully sent a webhook to its new URL, you will see its latest payload data:
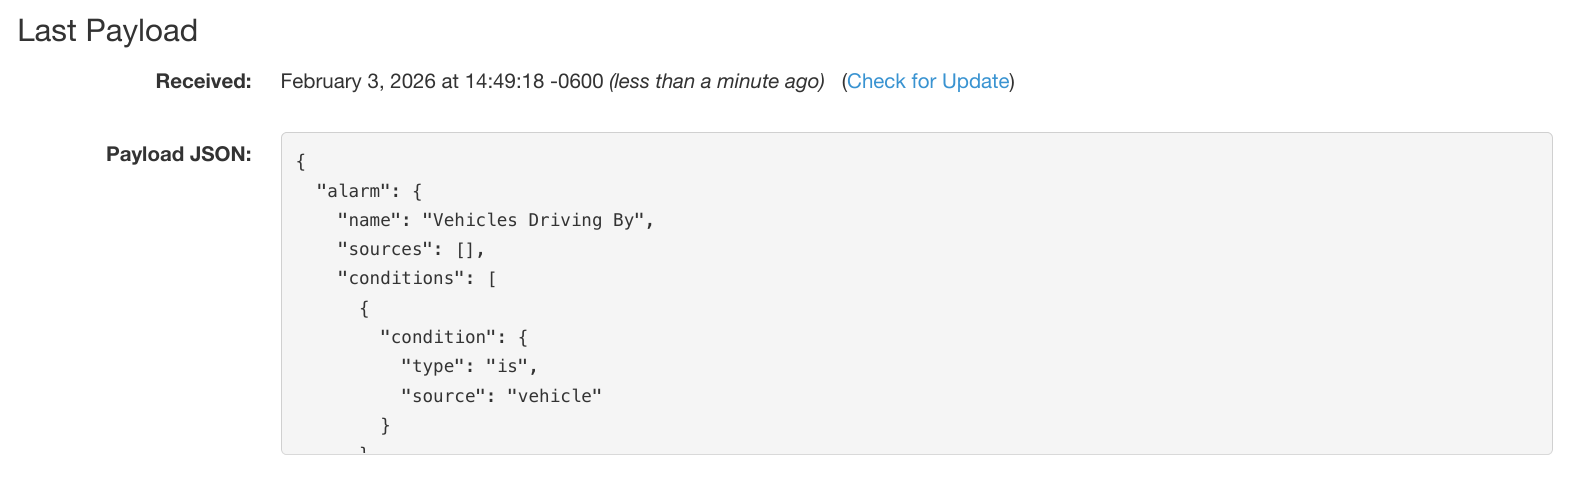
Now that we have a full JSON payload for working with, we can extract data from it and create notifications.
Extracting Data
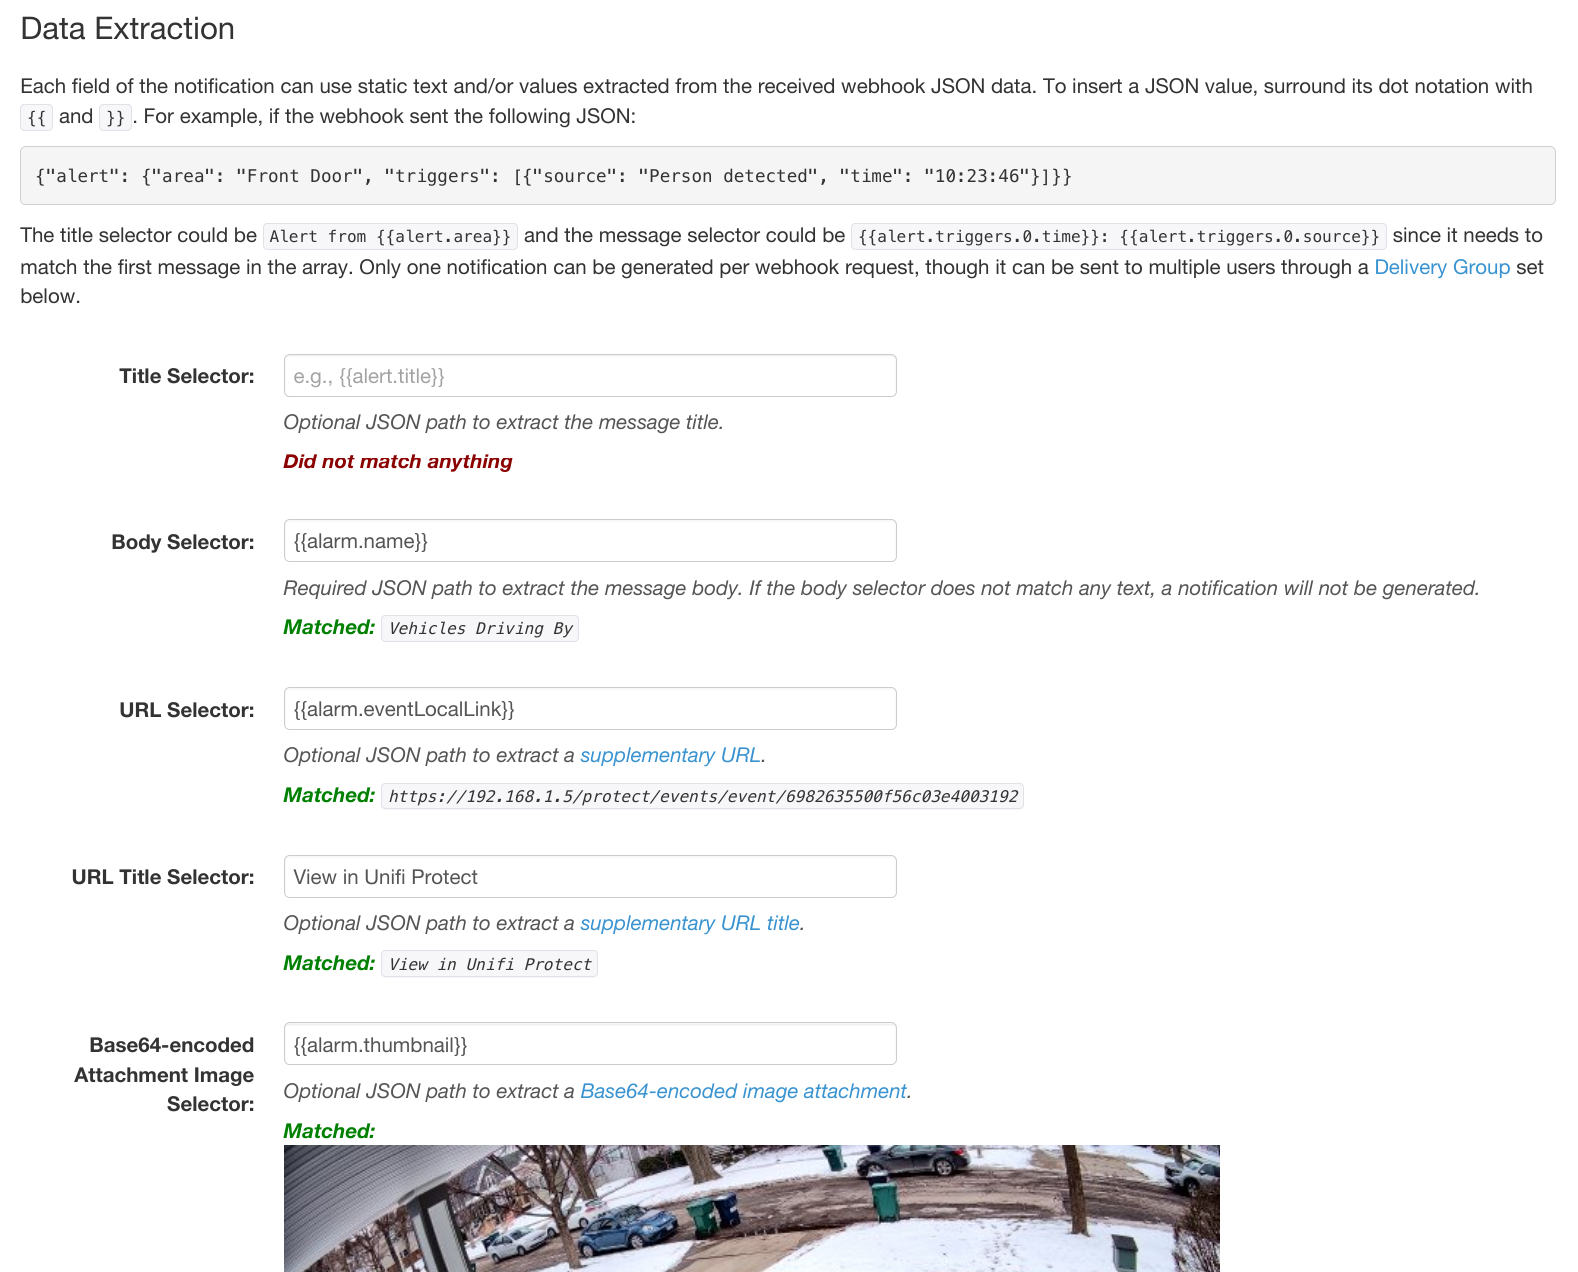
Each field in the final notification (title, body, URL, URL title, image) can use data extracted from each webhook payload, and/or include static text. Continuing with our example, we’re going to extract the title, image, and URL linking back to our Unifi dashboard.
For the “Body Selector” field, let’s include the name we used when creating the alarm in Unifi Protect. Since this comes through in the JSON as:
	{"alarm": {
	  "name": "Vehicles Driving",
	  ...
this would be represented as “{{alarm.name}}”.
Since we enabled the “Use Thumbnails” option in Unifi Protect, it included a
base64-encoded thumbnail at:
	{"alarm": {
	  "name": "Vehicles Driving",
	  ...
	  "thumbnail": "data:image/jpeg;...",
	  ...
so we can use “{{alarm.thumbnail}}” as the image.
At any point during this process, feel free to click the “Test Selectors on Last Payload” button to see how the extraction works without making any changes to your webhook. Note that if the “Body Selector” field extracts empty text, no notification will be sent.
Once you’re satisfied with how the data was extracted from your test payload, click “Save Settings”. Now the next time the webhook triggers, you should receive a Pushover notification.

Webhooks are available to all Pushover users today. You can get started by logging into your dashboard and clicking “Create a Webhook”.